Adding captions to your video
After recording using the Teleprompter App, it’s easy to add professional-looking captions.
In the preview page, tap Edit > Add captions
Add captions
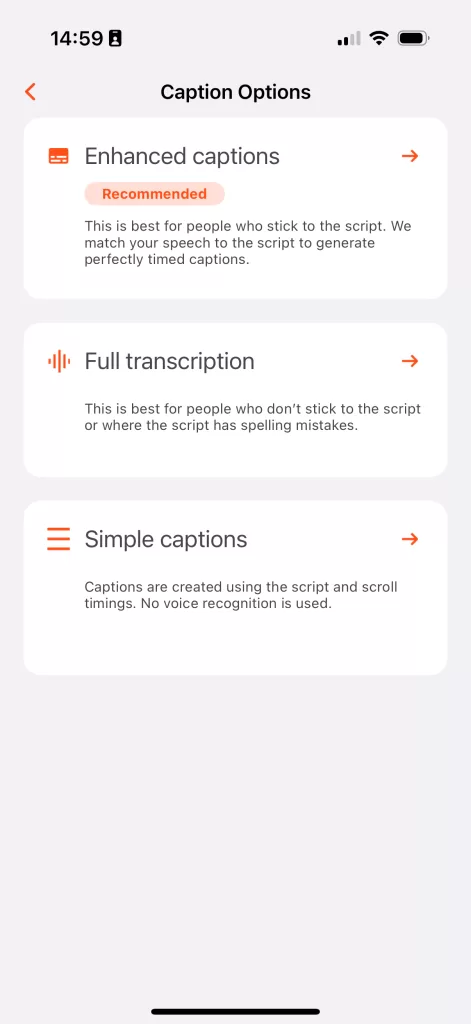
There are 3 options for adding captions:
Enhanced captions
This is our recommended option for people who stick to the script. We use the text from the script and match it to the transcription of your voice.
Timings from the transcription are then applied to the script to ensure the captions match the script perfectly and are in sync with your voice. This is a premium feature.
Full transcription
We transcribe the captions and timings from the video, ignoring the script. This is best for people who occasionally speak off-script, or where there may be spelling mistakes in the original script. This is a premium feature.
Simple captions
This is the simplest option and is available to all users. The app uses timings based on when the script scrolls near the camera. No transcription is used for this option.

Once the captions have been generated, you have various options for displaying and editing them.
Caption style
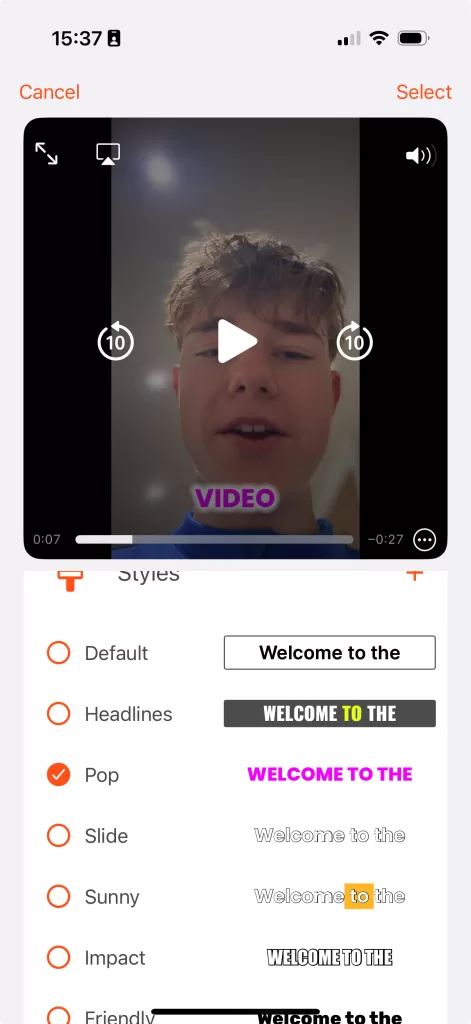
The app has 18 preset caption styles to choose from, and you can create bespoke styles.
Tap the style and preview it instantly on the recording.
To apply the style, press Select
After selecting the style, you can fine-tune the caption styling and adjust any aspect of the font, size, colours, background, position or animation.
Press Done to confirm the style.
Edit text and timings
All of the individual caption text and timings can be edited. Available to premium customers only.
Tap the caption to amend the text or adjust the start/end time.
Insert new captions if needed by tapping the + icon.
Export .srt
Export captions to an .srt file that can be imported into video editing or video sharing platforms.
SRT is the standard file format for subtitles and captions.
Remove captions
Remove all captions from your recording.


